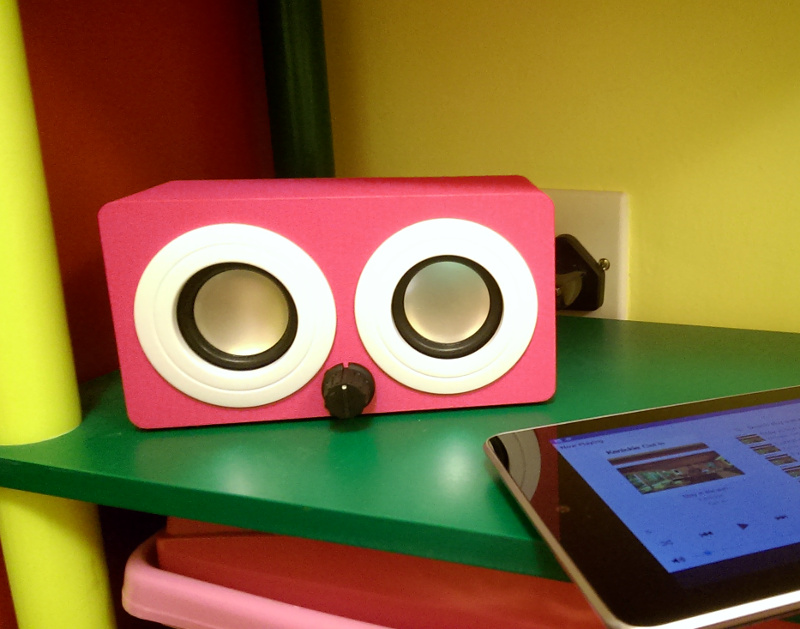
In this project, I describe how I transformed an inexpensive amplified speaker unit into a network-connected music player by embedding a Raspberry Pi Zero.
Components used:
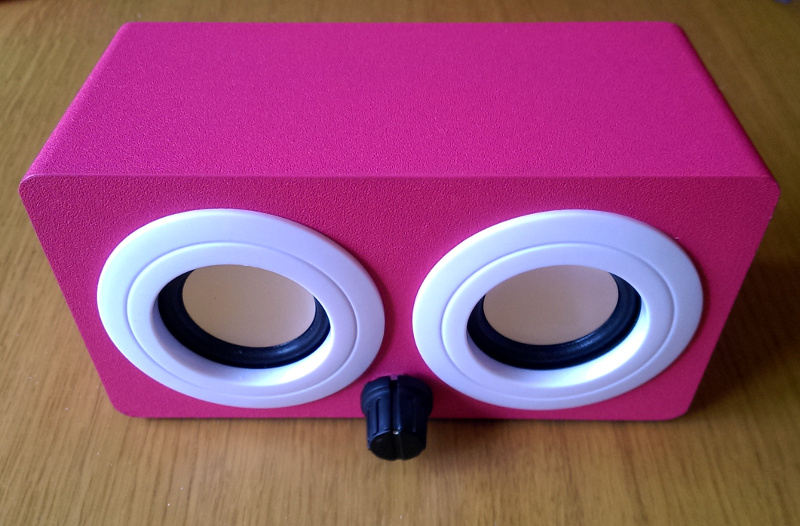
- An off-the-shelf amplified speaker unit – I used this one from B&M stores. Not the best audio quality, but I chose it due to the aesthetics (the unit was destined for a children’s playroom).
- Raspberry Pi Zero (hopefully they’re in stock!).
- pHAT DAC from Pimoroni, which gives the Pi Zero a high-quality audio output.
- WiFi dongle compatible with Raspberry Pi – I used the Official Raspberry Pi one (not needed if you’re using a Pi Zero W with WiFi).
- USB Micro-B adapter (often sold with the Pi Zero) – I used a right-angled one like this since it made it easier to fit in the box.
- Small length of stereo screened cable. The speaker unit I bought came with an audio lead, which I butchered. If not, you could recycle the cable from a broken pair of headphones.
The speaker unit I chose didn’t have a volume control, and I found the software volume control didn’t quite give enough, well, control, so I added a hardware volume control using the following:
- 10K dual logarithmic potentiometer.
- Suitable knob for the above.
Construction
The following schematic shows how I connected everything together:
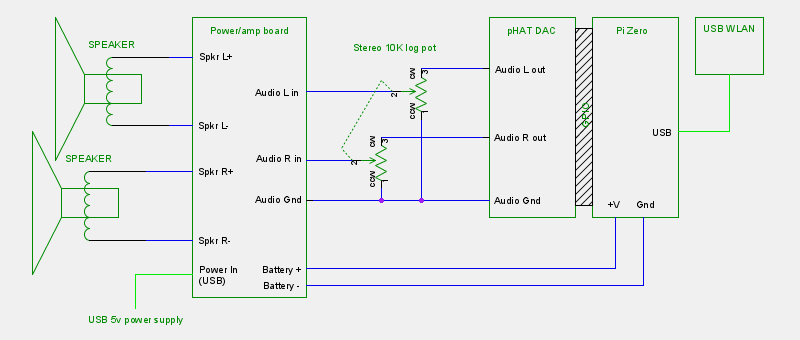
Power
The speaker unit I chose could be powered either by a Mini-USB socket, or 3 AA batteries. AA batteries give 1.5 volts (or 1.2 volts for rechargeable types), so 3 of these connected serially isn’t going to power the Pi Zero, since it requires 5 volts. I therefore chose to use the Mini-USB to supply power to the device, which obviously should give 5 volts when connected to an appropriate USB power supply. Remember to check the current requirements when choosing a power supply – the speaker unit should state how much current it takes on it’s label, and add an additional 500mA or so for the Pi Zero and WiFi dongle.
If you don’t want to be restricted by having the device plugged into a wall outlet, you could look at powering it from a rechargeable USB power bank. This could either be plugged into the back via a USB cable, or embedded inside the device (though you would need to be able to access the power input for recharging).
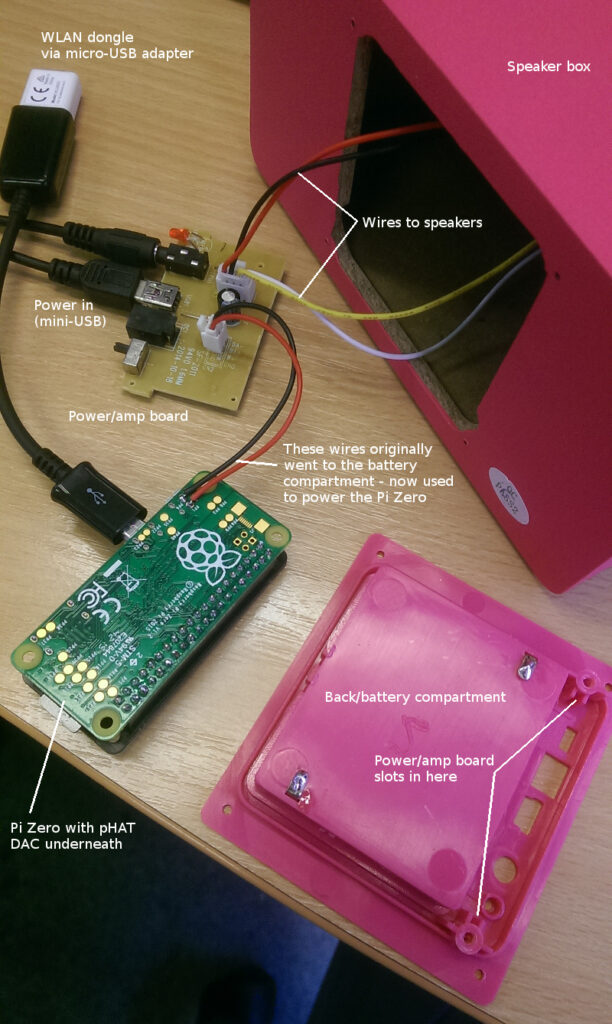
I disconnected the cables leading to the battery compartment, and found these to be a convenient way to power the Pi Zero since they were also connected to the USB power supply on the board. I soldered these cables directly to the Pi Zero using the pads underneath the Micro-B USB power socket. The positive (red wire) to the pad labelled PP1, and the negative (black wire) to the pad labelled PP6.
Audio
The audio input to the speaker unit is via a 3.5mm jack socket on the amplifier board. I traced these connections from the socket on the PCB and located convenient points at which to solder the left, right and ground connections to the stereo screened cable. This cable was then routed internally, leading to the audio output connections on the pHAT DAC board. If, like me, you’re adding a hardware volume control, these should go via the 10K logarithmic potentiometer (referring to the schematic above).
I connected the pHAT DAC onto the Pi Zero via the GPIO connector (I had to solder the supplied connectors onto each first), and stuck the Pi Zero onto the back of the battery compartment, where it sat just above the amplifier board. I plugged the WiFi dongle into the Pi Zero via the Micro-USB cable, and made sure it all fitted inside the speaker unit.
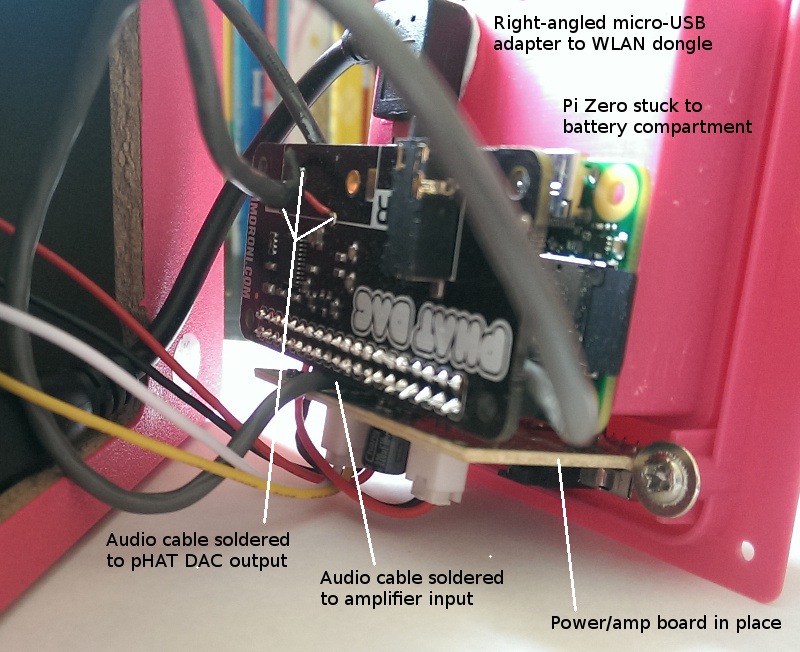
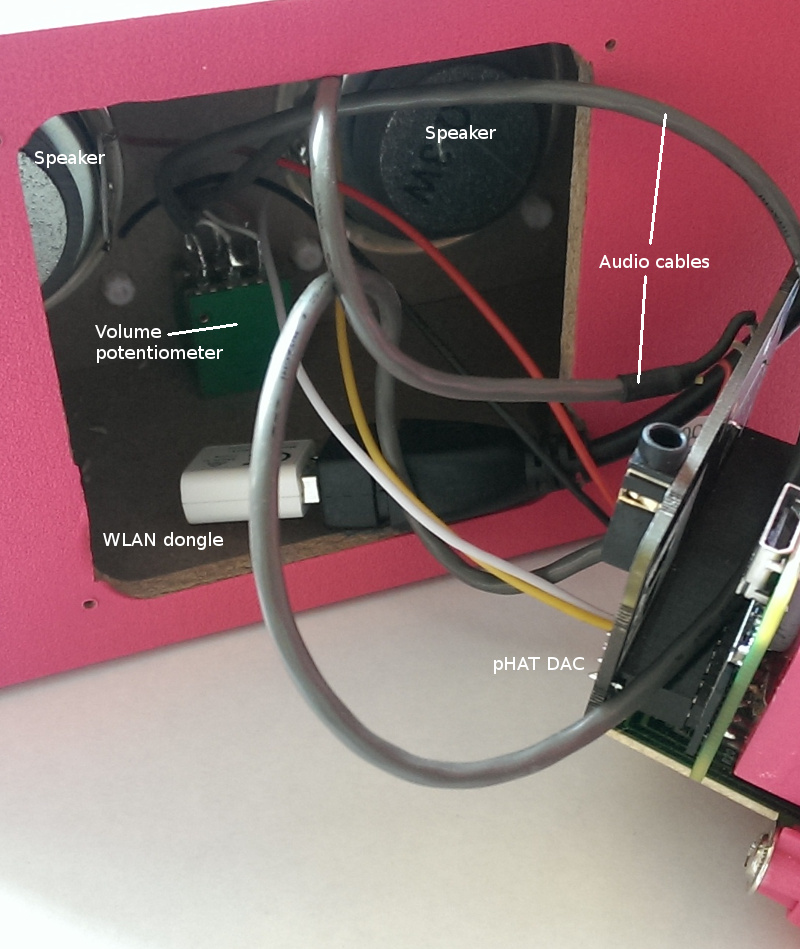
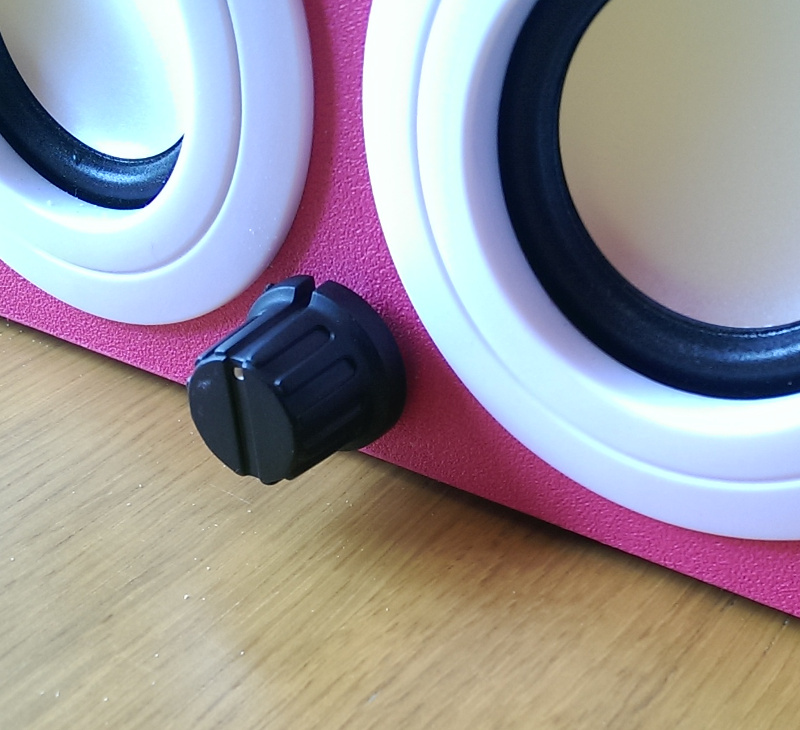
For the volume control, I drilled a suitable hole in the front of the box to fit the potentiometer shaft, and locked this in place with the supplied nut. The shaft was then cut to length and the knob applied.
Software
I prepared a Micro SD card with the latest Raspbian image – I actually used the “Jessie light” version since the device would be used as a server and didn’t require any UI or desktop environment. I found a spare 4GB card I had gave plenty of room, in fact I think 2GB would be OK too, assuming that, like me, you aren’t going to be storing any audio files on the device itself, but accessing them from a server via the network. If you intend to store audio files on the device, then you probably need a bigger card.
I booted from the SD card using another Raspberry Pi and entered the required settings to connect to my WiFi network in /etc/wpa_supplicant/wpa_supplicant.conf. Alternatively, you could temporarily plug a monitor and keyboard into the Pi Zero itself to do this. I also changed the hostname from the default “raspberrypi” (using the raspi-config program) so I could identify it easily when it connected to my network.
I then inserted the Micro SD card into the Pi Zero before screwing on the back of the speaker unit and switching it on. After the Pi has booted, you should be able to find the Pi on your network (I use my WiFi router’s admin interface which lists connected devices and IP addresses), and connect to it using SSH (username “pi” and password “raspberry” by default – but I’d recommend you change this).
I followed the excellent instructions on the Pimoroni website to setup the pHAT DAC (ignoring their advice and setting my speaker volume to maximum!)
I added a line in /etc/fstab to mount my music collection on a server machine. I used NFS4 for this, which required the package “nfs-common”. You could also use samba, if your server is of the Windows variety.
I then installed Mopidy, which is a music server which supports the protocol used by MPD (Music Player Daemon), which has a wide range of client support.
Refer to the Mopidy website for configuration details. For reference, my /etc/mopidy/mopidy.conf file looks like:
[logging]
config_file = /etc/mopidy/logging.conf
debug_file = /var/log/mopidy/mopidy-debug.log

[local]
enabled = true
data_dir = /var/lib/mopidy/local
media_dir = /mnt/server/music
playlists_dir = /var/lib/mopidy/playlists


mixer = software
mixer_volume = 5
output = autoaudiosink

[mpd]
enabled = true
hostname = ::
port = 6600
(where /mnt/server/music is the location of my music on my mounted server)
Then enable and start the Mopidy server with:
$ sudo systemctl enable mopidy
$ sudo systemctl start mopidy
Which should start it now, and cause it to start automatically on boot.
I then used the command:
$ sudo mopidyctl local scan
To perform a scan of the available music. This can take a while, depending on how many files you have (and how fast your WiFi network is).
Now to actually play something. For testing, I installed ncmpcpp on the Pi itself. ncmpcpp stands for NCurses Music Player Client (Plus Plus) – a name that I find almost impossible to remember, let alone type! This presents a console mode UI (perfect for use over SSH).
For something a bit more user friendly, my favourite client is MPDroid which runs on Android devices, and has an interface which is quite like the default Android music player, so most people should find it fairly intuitive.
I’m still experimenting with the software really – there’s certainly more that Mopidy can do that I haven’t yet explored, such as streaming from online music services and podcasts, and there’s plenty more software available to try. The possibilities are endless!